Local Kubernetes development with LXD
The purpose of using LXD on a local machine is to emulate the same deployment that a user would use in a cloud or bare metal. Each node is treated as a machine, with the same characteristics as production. Each node is a separate container, which runs Docker containers and kubectl inside (see Cluster Intro for more info).
Overview
Running Kubernetes locally has obvious development advantages, such as lower cost and faster iteration than constantly deploying and tearing down clusters on a public cloud. Ideally, a Kubernetes developer can spawn all necessary nodes inside local containers and test new configurations as they are committed. This page will show you how to deploy a cluster to LXD containers on a local machine.
Before you begin
Prerequisites
In order to simplify local deployment this method leverages the Conjure Up tool.
This will provide a pseudo-graphical set up in a terminal that is simple enough for developers to use without having to learn the complexities of operating Kubernetes. This will enable new developers to get started with a working cluster.
Getting Started
First, you need to configure LXD to be able to host a large number of containers. To do this we need to update the kernel parameters for inotify.
On your system open up /etc/sysctl.conf *(as root) and add the following lines:
    fs.inotify.max_user_instances = 1048576
    fs.inotify.max_queued_events = 1048576
    fs.inotify.max_user_watches = 1048576
    vm.max_map_count = 262144
Note: This step may become unnecessary in the future
Next, apply those kernel parameters (you should see the above options echoed back out to you):
sudo sysctl -p
Now you’re ready to install conjure-up and deploy Kubernetes.
    sudo snap install conjure-up --classic
    conjure-up kubernetes
Note: During this set up phase conjure-up will ask you to “Setup an ipv6 subnet” with LXD, ensure you answer NO. ipv6 with Juju/LXD is currently unsupported.
Walkthrough
Initiate the installation with:
conjure-up kubernetes
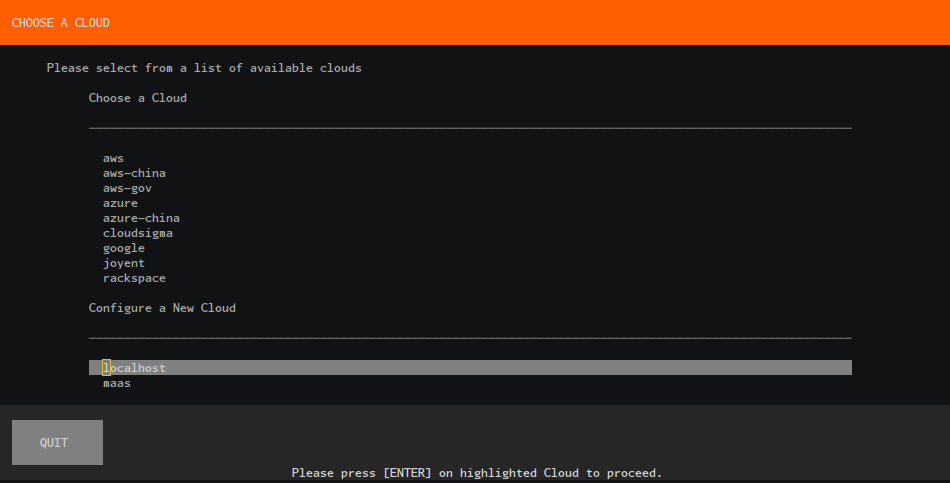
For this walkthrough we are going to create a new controller, select the localhost Cloud type:
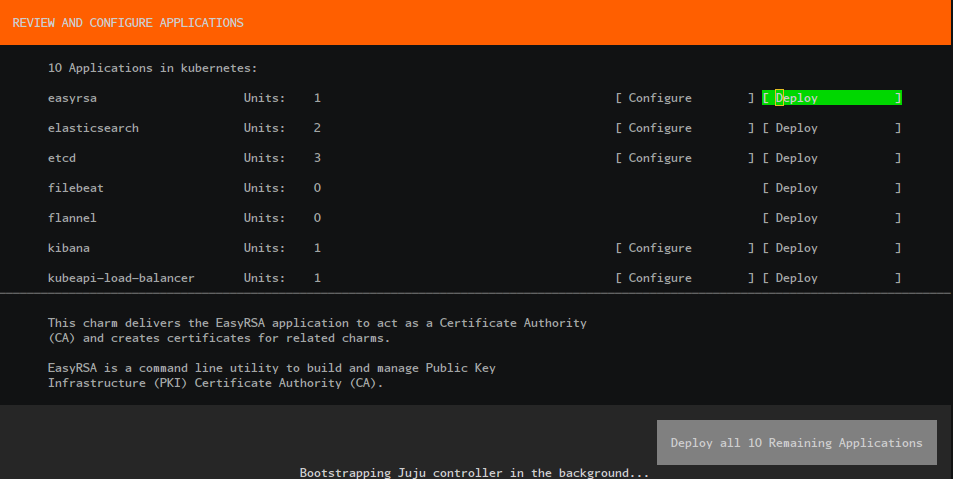
Deploy the applications:
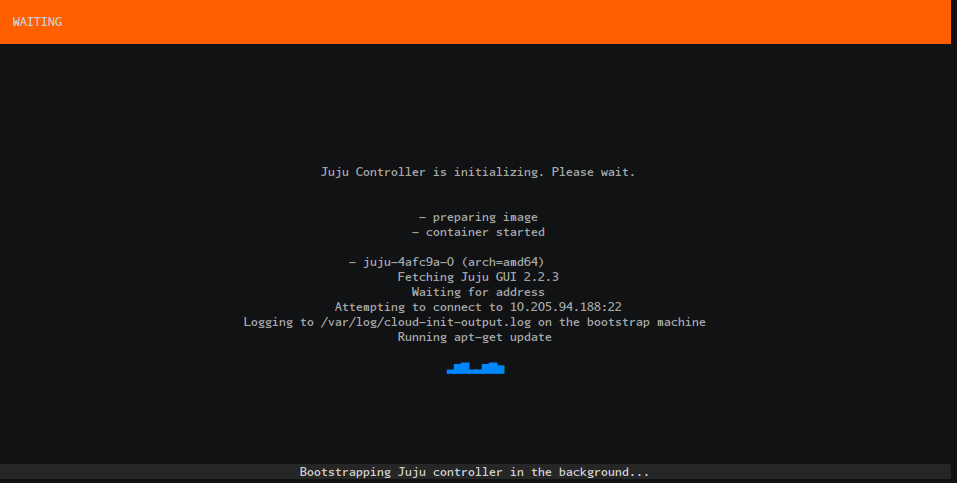
Wait for Juju bootstrap to finish:
Wait for our Applications to be fully deployed:

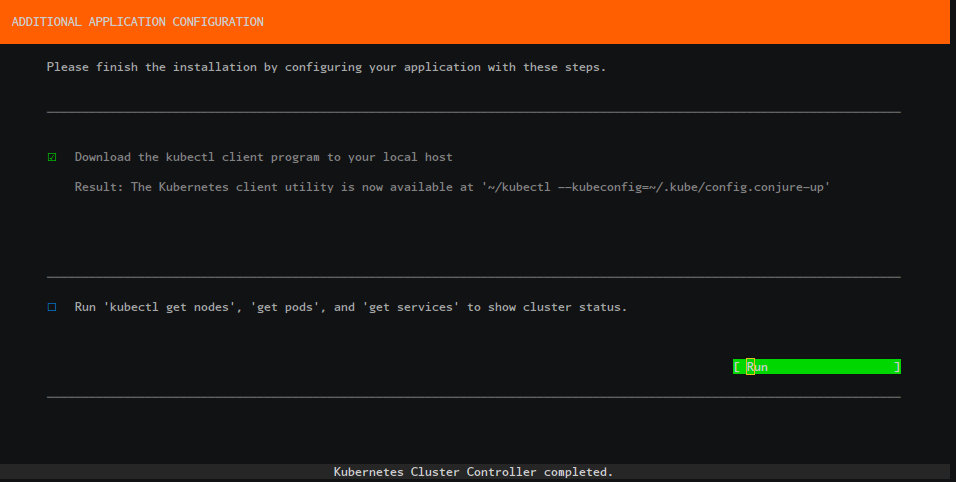
Run the final post processing steps to automatically configure your Kubernetes environment:
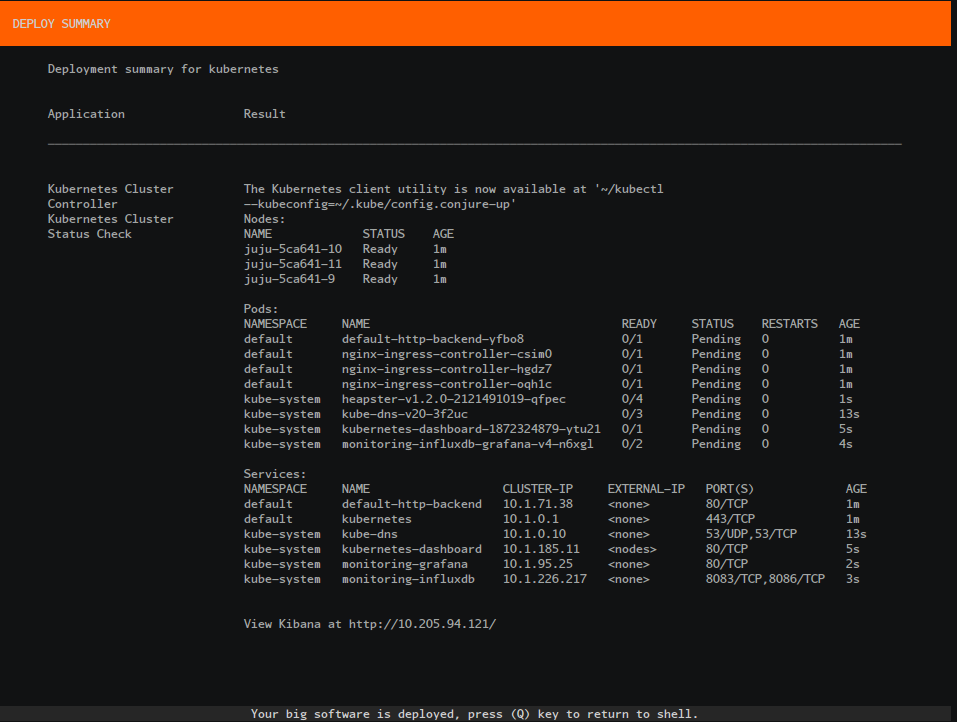
Review the final summary screen:
Accessing the Cluster
You can access your Kubernetes cluster by running the following:
~/kubectl --kubeconfig=~/.kube/config
Or if you’ve already run this once it’ll create a new config file as shown in the summary screen.
~/kubectl --kubeconfig=~/.kube/config.conjure-up